Migrating our Enterprise Production Environment From ESXi to Xen
October 18, 2015
When I started developing software at my current workplace, our web app server was running Turnkey Linux on Debian 6 inside a hypervisor running VMware ESXi 4.5; all of these tools were already very obsolete when I joined the development environment, and after over two years, it was time to make some changes.

I decided to move to a modern, open source hypervisor and the current version of Debian without the hundreds of irrelevant packages that come with Turnkey Linux. I started by creating a new VM and installing Debian 8 with Apache, PHP and MySQL and then I migrated all the PHP scripts and the database over from the old web app VM to this new virtual server. Now it was time to create a temporary hypervisor while I upgrade the current physical server. I found a disused workstation from the office and installed XenServer on it. Both VMWare and Xen have a feature where you navigate to the server’s IP address in a browser and they give you a download for the desktop management tool to let you work with the server. Installing these was simple enough, then I exported all the old ESXi hypervisor’s virtual machines to OVF files, a universal standard format for virtual machine migrations. Importing them into XenServer took A LONG TIME; I ended up leaving it overnight. But there were no problems on any of the VMs; Windows or several flavors of Linux, everything went very smoothly. With the new VMs successfully imported, I shut down the old VMs and Started them new ones up. They took over their same static IPs and booted up as though nothing had happened.
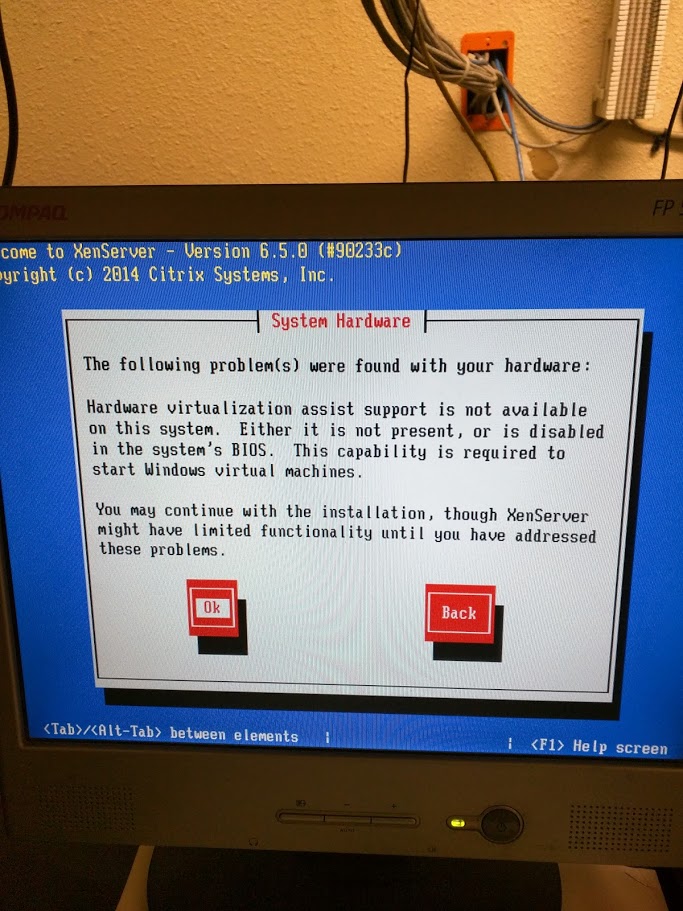
Now it was time to upgrade the old VMWare ESXi server to Xen. This process was a lot harder than I expected, and I did encounter two problems trying to get it to boot up for the first time. Because it was an older Dual-Xeon server, it was missing an architecture feature required for some types of virtualization. It said Windows VMs might potentially have issues. This is fine for me because I am not using any Windows VMs. I looked at Dell’s website and there are no BIOS updates currently available which appear to resolve this issue. It may be impractical to use an older Dell server like this for hosting windows machines with Xen.
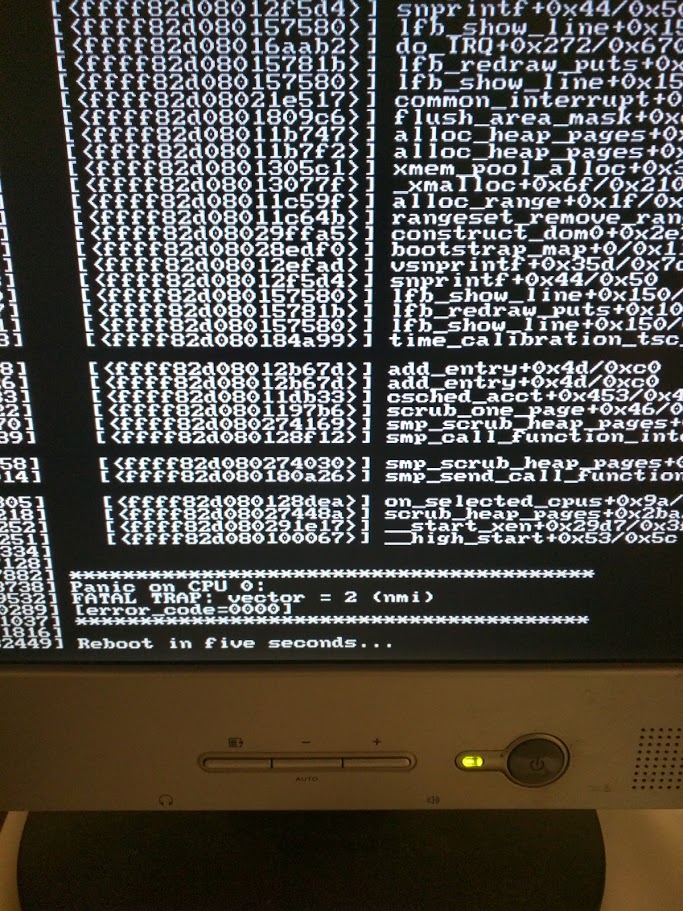
Another problem arose because the older hyperthreading architecture threw a non-maskable interrupt parity error which caused a Kernel Panic and halted the machine. It took hours of research and work to solve this problem. The first step was to disable hyperthreading in bios. Dell couldn’t make this simple; my server’s bios referred to it as disabling the “Logical Processor Feature.” Now the server was able to boot up, though it was only using one core on just one of its CPUs, instead of all the cores on both Xeons. In order to prevent this Kernel panic, we need to tell the system to skip parity checks for NIM (or non-maskable interrupts). This is theoretically simple enough, but finding the bootloader configuration file proved very difficult as it was not in any of the normal places. Once in the “Console” section of the XenCenter tool, the next step was finding the bootloader configuration file. This may differ for different versions of Xen, mine is 6.5. I eventually found the file here;
/boot/extlinux.conf
Find the section that looks like this…
label xe
  # XenServer
  kernel mboot.c32
  append /boot/xen.gz dom0_mem=752M,max:752M watchdog
We need to add “nmi=ignore” into the “append” section like so;
label xe
  # XenServer
  kernel mboot.c32
  append /boot/xen.gz dom0_mem=752M,max:752M watchdog nim=ignore
After saving this file, I was able to reboot and turn the “Logical Processor Feature” back on, enabling all the cores and CPUs in the server. Then I was rewarded with a happy boot screen;

Moving the virtual machines back to this server was as simple as moving them to the temporary one. Now everything is setup and running happily on this new, modern and open source hypervisor! :D